On screen display support (OSD overlay)
Last modified: 16 January 2026
The HxC firmware for Gotek supports the On-Screen-Display / OSD video output. You can select images and see the floppy emulator status on the machine’s screen without any additional software or LCD/OLED screen ! No need to make holes in the machine case anymore ;).
|
Note
|
OSD feature currently supported on all STM32F105 and AT32F435 (AT4.35 / U100LQD with F435 MCU) Goteks ! |
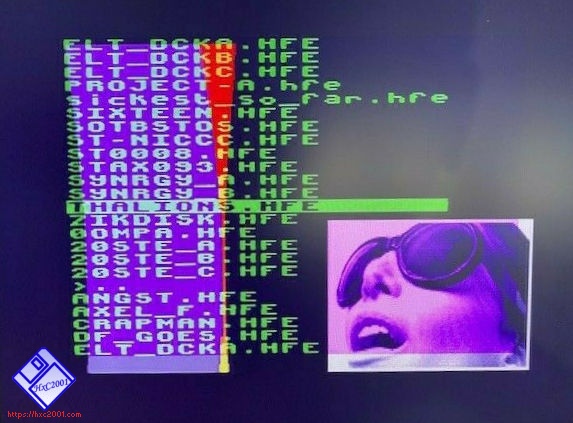
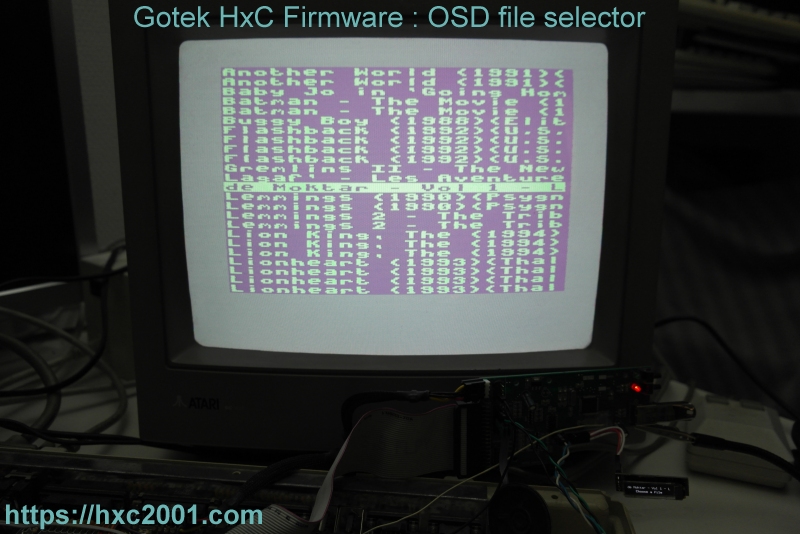
OSD File selector :
Videos
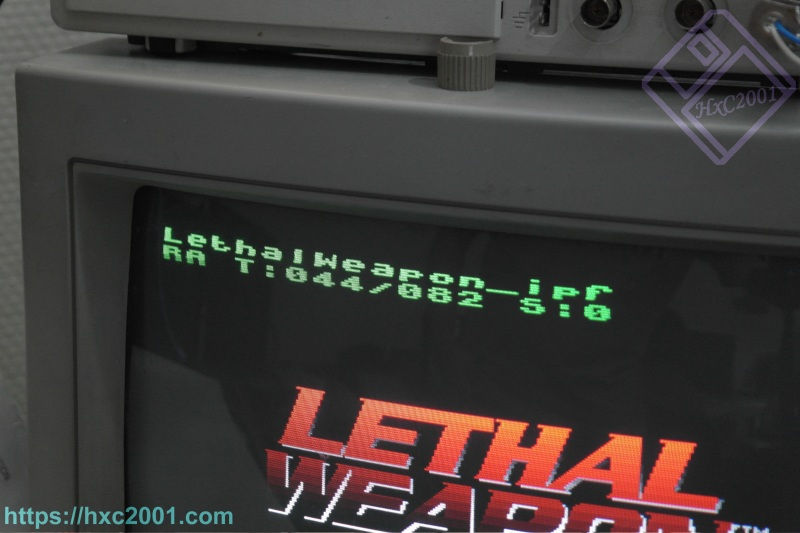
OSD File selector demo :
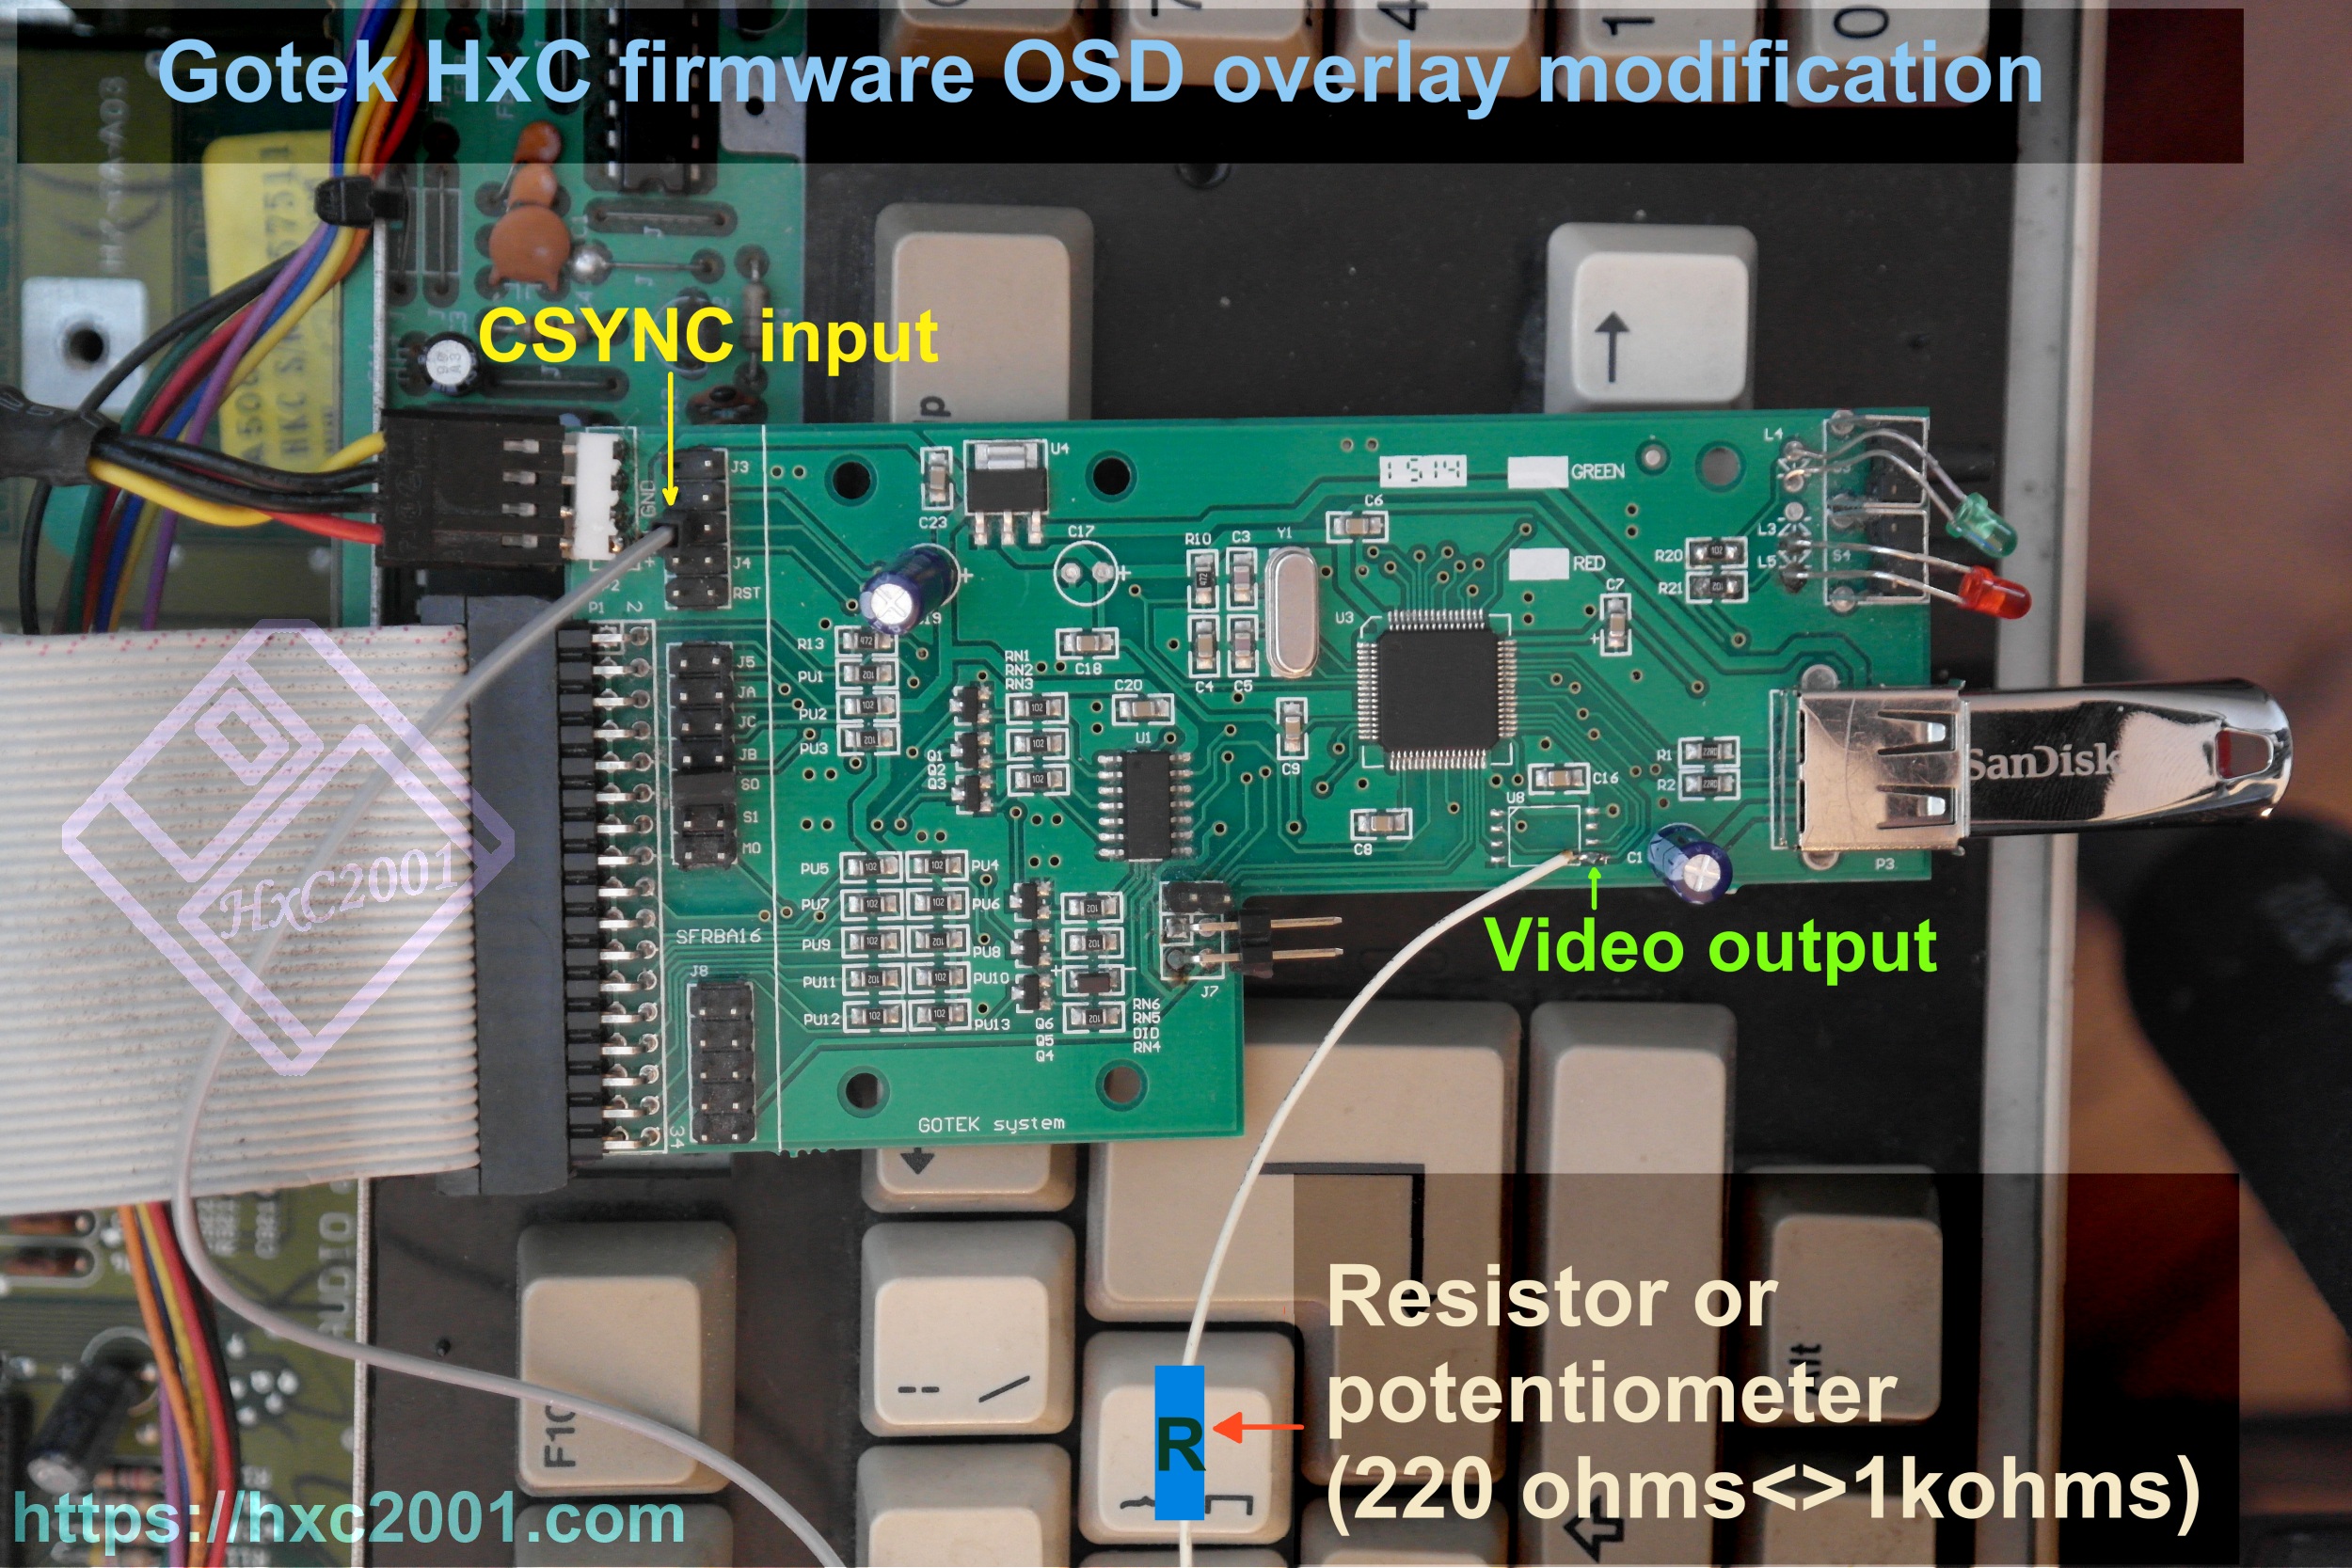
You only need 2 wires and a resistor to connect the Gotek to the machine’s video signals : One wire is used for the CSYNC video signal (Composite Sync), the other wire for the red, green (prefered) or blue signal.
One resistor must be put in serie on the color signal between the Gotek and the machine. You can use a value between 220 and 470 ohms for this resistor. A potentiometer can be also used to tune the OSD brightness/contrast.
This was currently tested on Amiga 500, Atari STE and Amstrad CPC 6128 machines, but should work with any machines having a composite sync signal.
On machines without CSYNC signal available you can enable the additional input for the VSYNC signal at Gotek U8 Pin 1 (PB12) on the custom firmware page : https://hxc2001.com/custom_fw/
|
Note
|
If the standby/hide delay is too long or too short for you, you can change the screen standby timeout value in the embedded menu "screen standby" setting. |
HxC Firmware for Gotek OSD wiring
Gotek wiring :
Amiga 500 :
OSD Video out : Gotek U8 Pin 5 (PB15) → 220 / 470 ohms resistor (or a 1k ohms potentiometer) → Amiga 500 Ferrite bead E432 (see picture). OSD Video CSYNC in : Amiga 500 U41 Pin 8 → Gotek "JTCK-SWCLK" pin (PA14) (near the serial tx programming pin, please see picture).

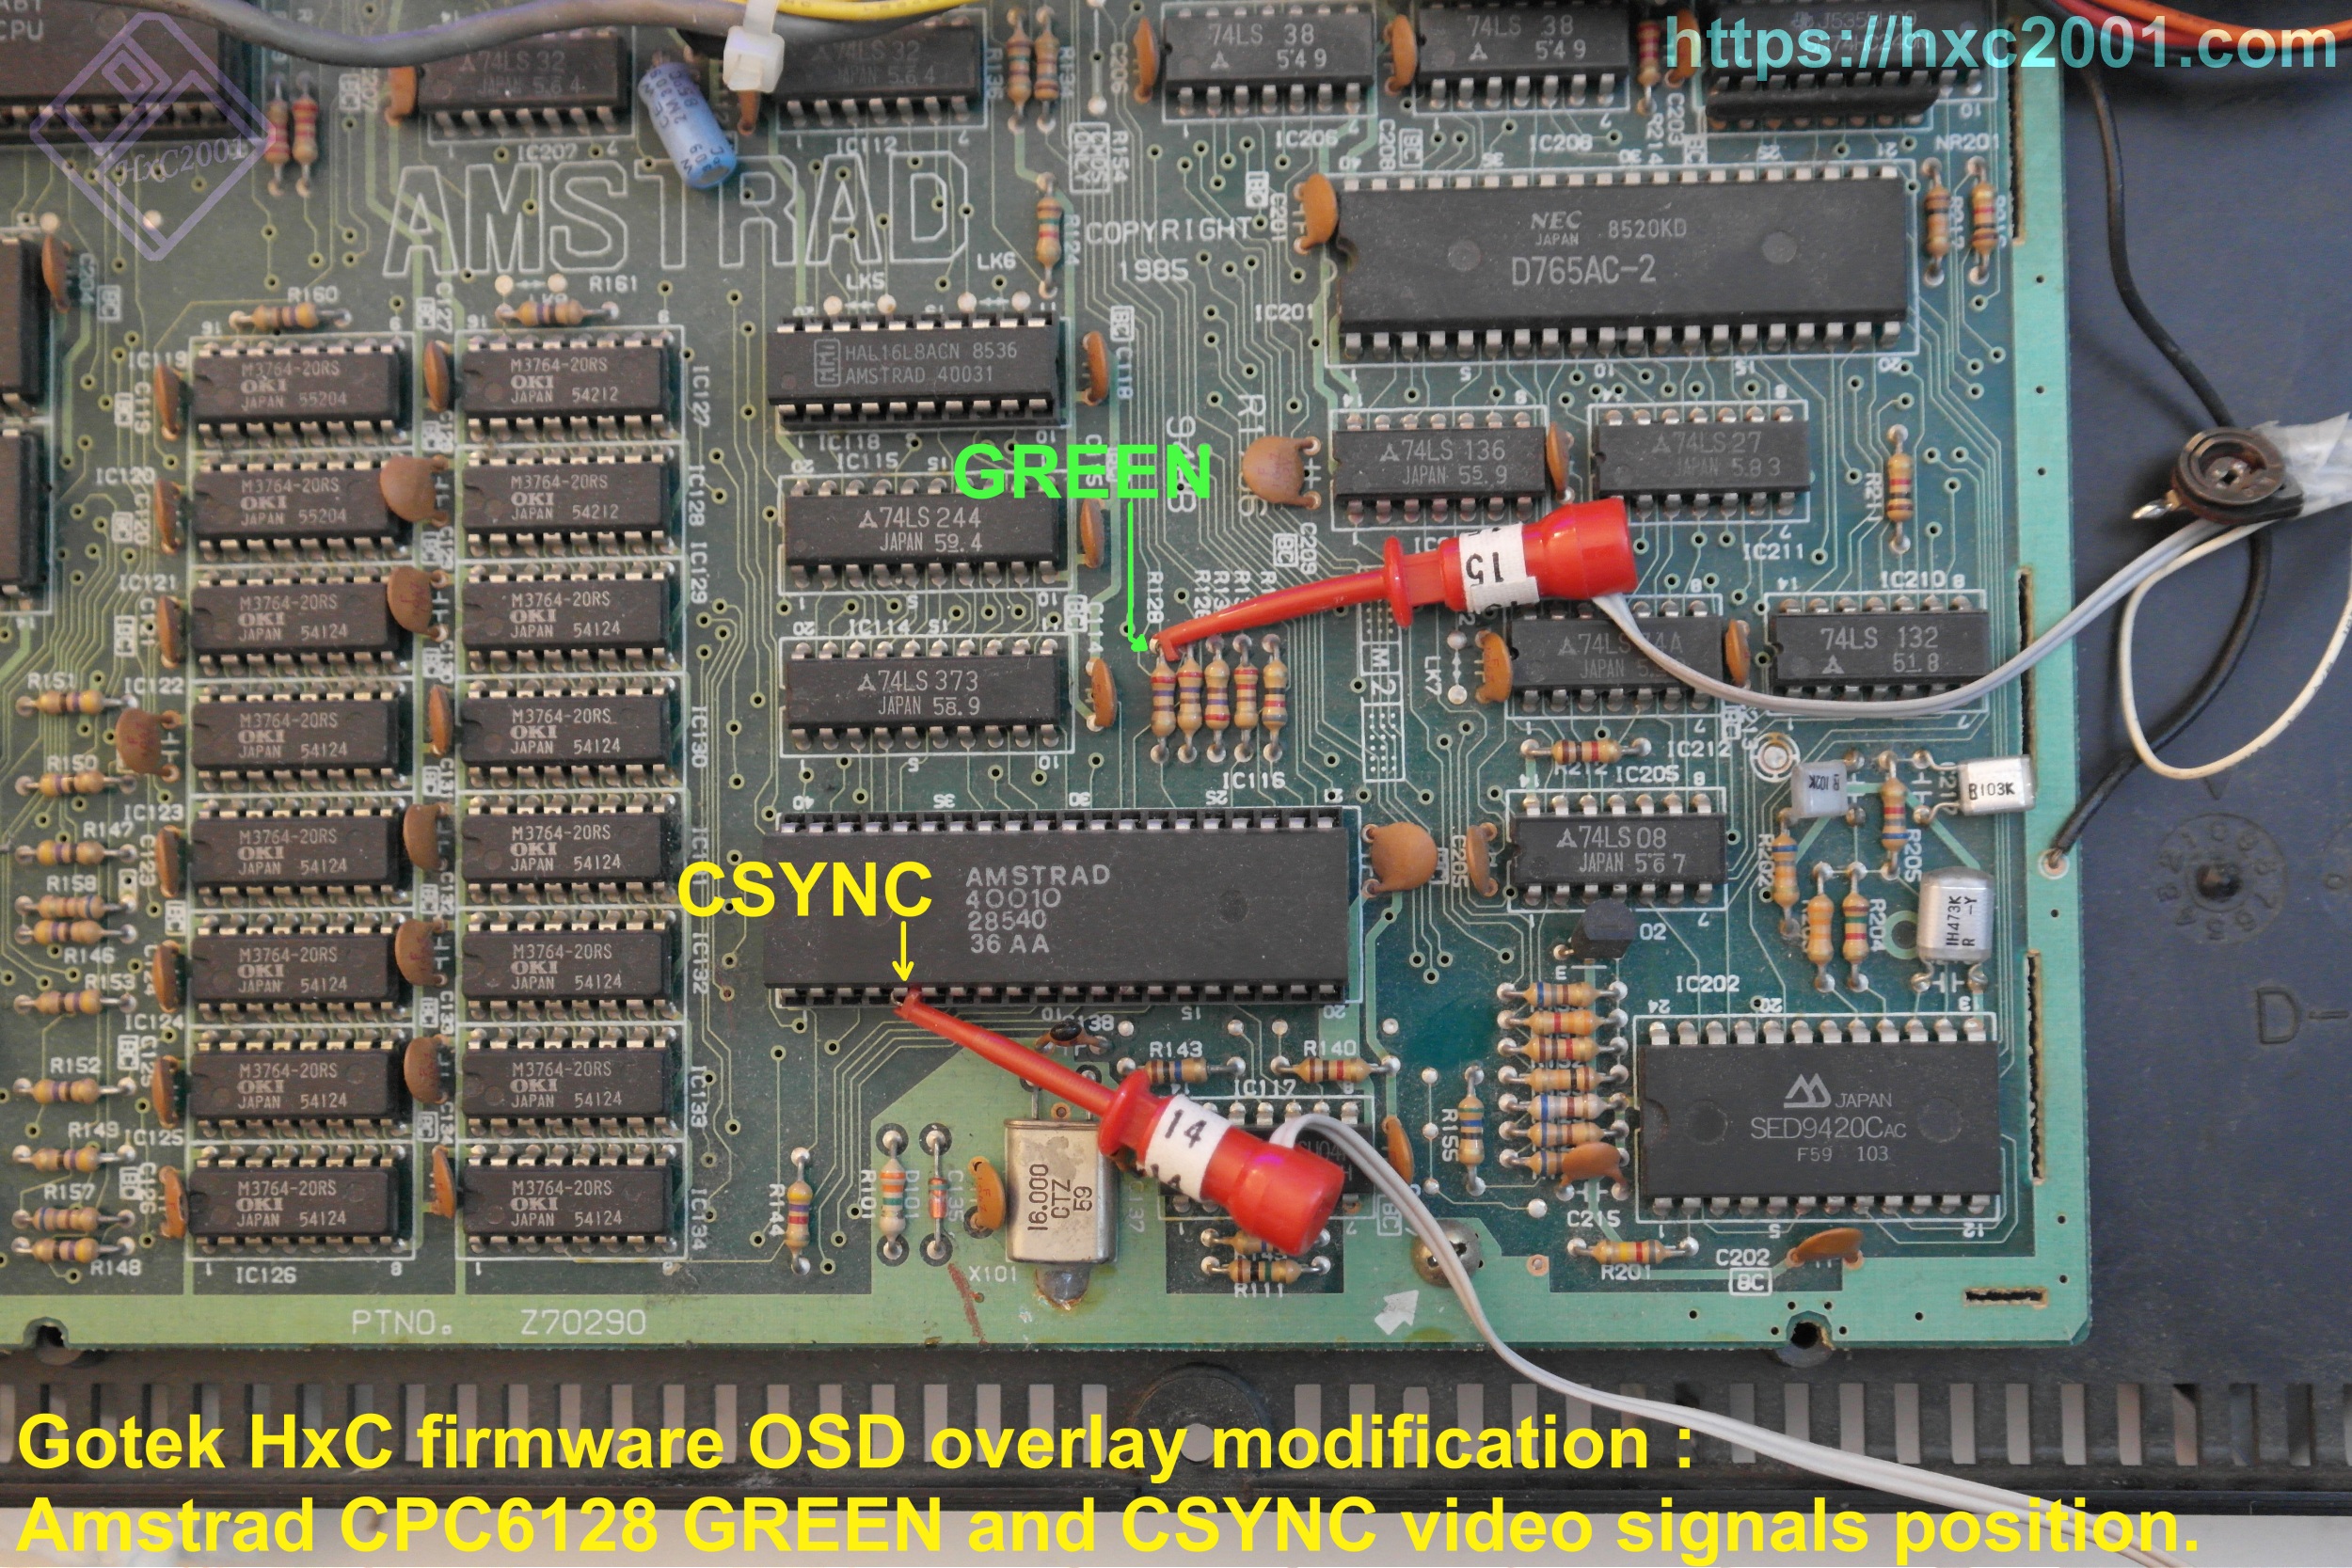
Amstrad CPC6128 :
OSD Video out : Gotek U8 Pin 5 (PB15) → 220 / 470 ohms resistor (or a 1k ohms potentiometer) → CPC6128 R128 (see picture). OSD Video CSYNC in : CPC6128 IC116 Pin 5 → Gotek "JTCK-SWCLK" pin (PA14) (near the serial tx programming pin, please see picture).
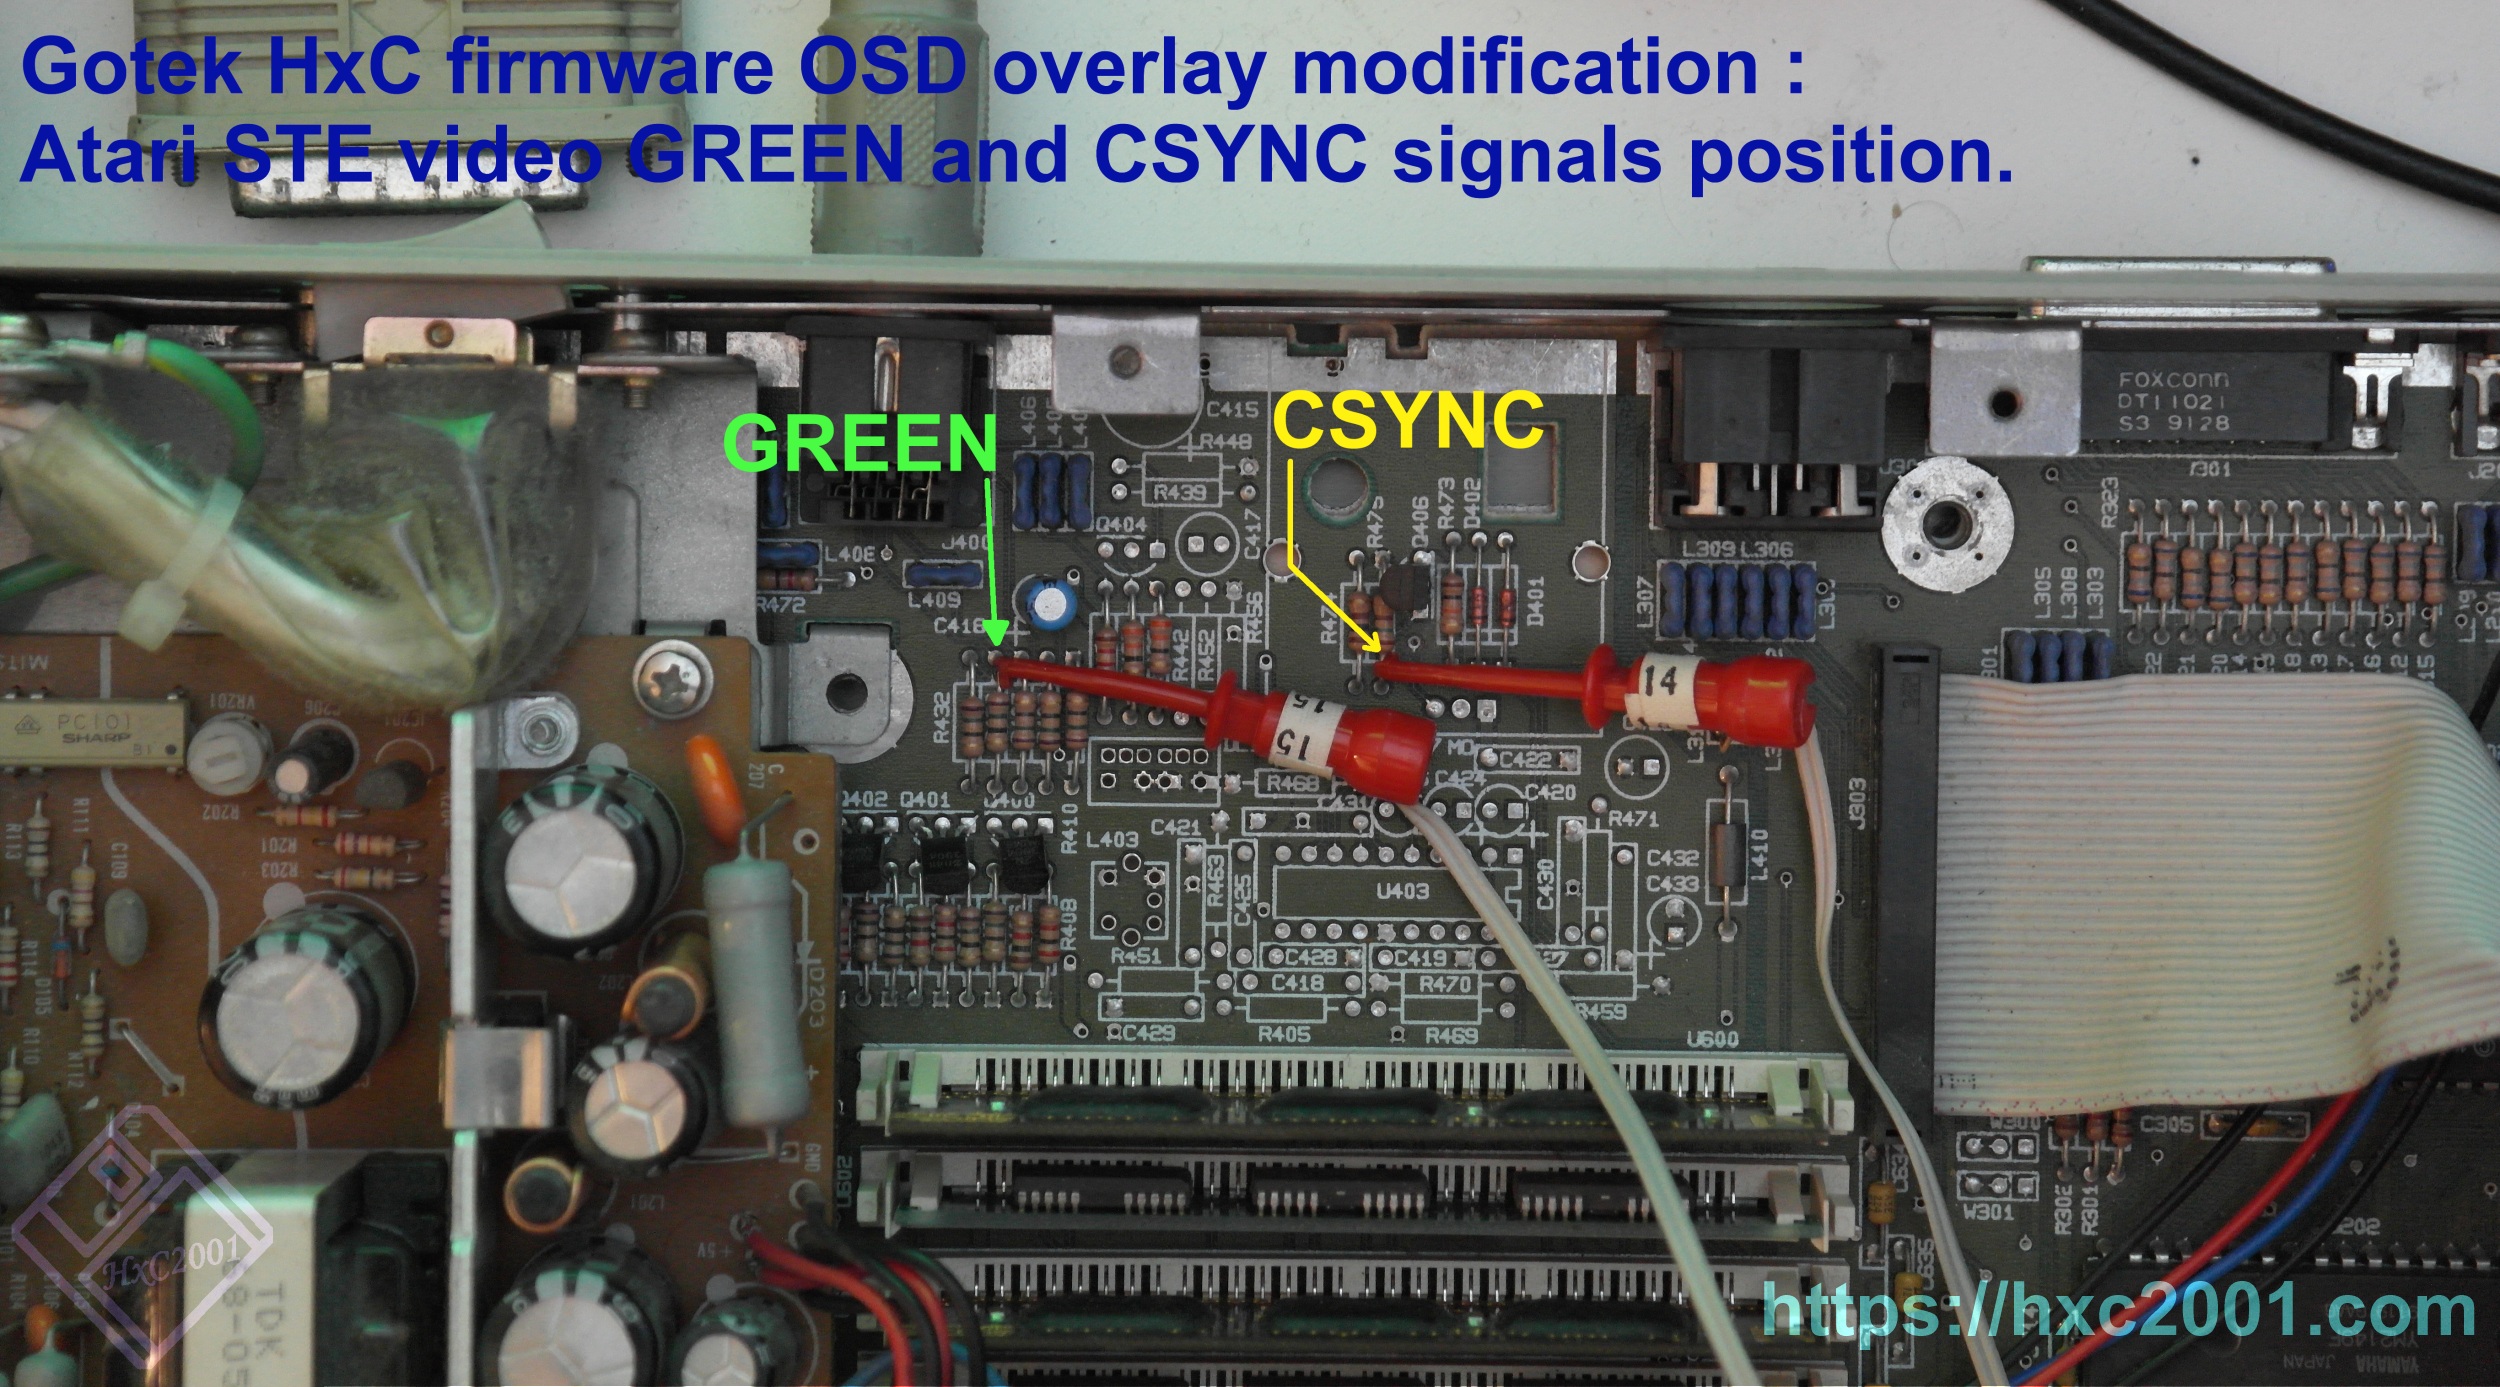
Atari STE :
OSD Video out : Gotek U8 Pin 5 (PB15) → 220 / 470 ohms resistor (or a 1k ohms potentiometer) → Atari STE R420 (see picture). OSD Video CSYNC in : Atari STE R475 → Gotek "JTCK-SWCLK" pin (PA14) (near the serial tx programming pin, please see picture).
Last modified: 16 January 2026
| HxC Floppy Emulator project | Legal Mentions | (C)2006-2026 HxC2001 / Jean-François DEL NERO |