Buttons and Rotary Add-ons
Last modified: 01 August 2025
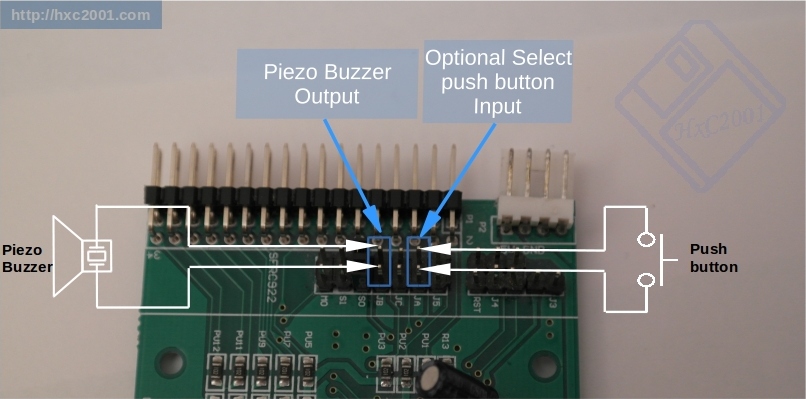
Optional Add-on : The "Select"/middle button
An additional button can be connected to the Gotek JA jumper position. Needed if you want to browse the USB stick files images with the LCD and the button (Normal mode). EDIT : Now optional since the firmware v3.0.21.1a

Optional Add-on : Rotary switch / Blackberry trackball
You can connect a Rotary switch to the J7 connector (Same connector used for the screens connection).
-
"Direction / Dir" → J7 pin 1. (near the "JK" marking on the PCB)
-
"Clock / Ck" → J7 pin 2.
-
"Dir" & "Ck" position on J7 :
-
                           _____|
                          |     |
                          | USB |
                          |_____|
    Dir OO Ck___________________|
    SDA OO|SCL
    GND OO|VCC3V3
        J7|
          |
__________|
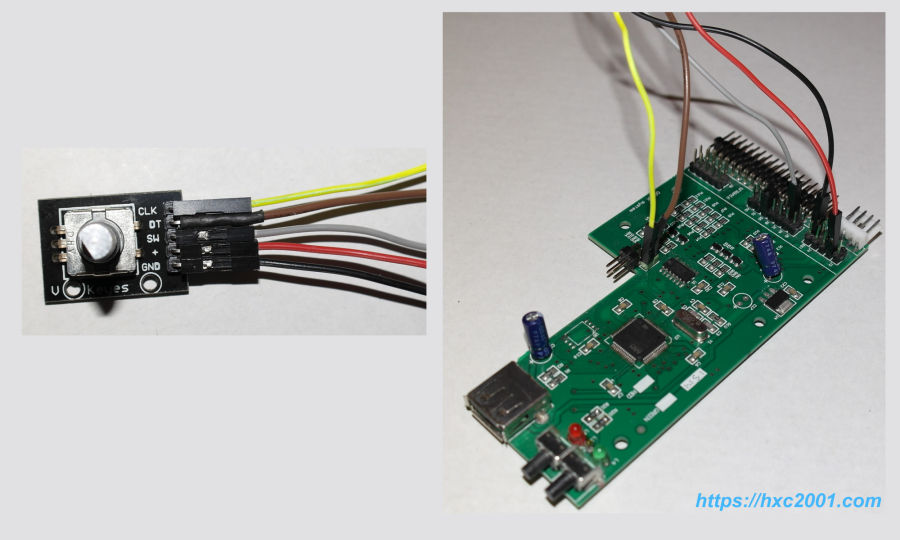
If your rotary switch have also a push-button, you can connect it as the select button to the "JA" jumper position
Wiring example :

|
Note
|
Yellow and brown wires can be exchanged to set the rotary clockwise or counterclockwise. |
|
Note
|
The Red wire is only needed when your rotary have some pull-up resistor on its PCB. |
|
Note
|
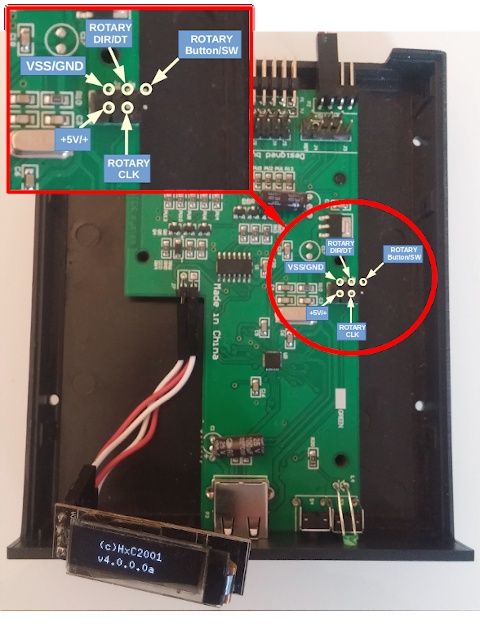
Since 2021 some new Gotek PCBs have now a specific connector for the rotary. If this port is available on your Gotek, please use the following wiring instead : |

Last modified: 01 August 2025
| HxC Floppy Emulator project | Legal Mentions | (C)2006-2025 HxC2001 / Jean-François DEL NERO |